
Building an Arrow
One of the more entertaining exchanges over the club's WhatsApp in recent years has been the suggestion, often in pictorial form, that Geo uses hacksaws, breadknives as well as a hammer and chisel to cut John's arrows. He doesn't but these exchanges are amusing when you consider John's expensive shafts being cut to size by a maniac with a hacksaw. But what actually goes on "off camera"?
 Building arrows is something that most archers really don't need to do .. unlike say fletching or serving a string .. but it never hurts to know how its done. The components are quite straight forward .. points or inserts, shafts, nocks and nock pins if required. Hotmelt and 24hr epoxy are the glues we'll use. This article will address only getting the arrow into its basic bare shaft state. Fletching is for another day. We'll assume its a nice set of carbons we're setting up.
First task is to get the nock end cleaned up. Here we are going to cut just 1mm off the end that will take our nock pin. This is to make sure its a cleanly cut surface .. there's no telling what happened to the ends of the shaft between production and receipt so this cut tidies things up. The transfers on the shaft go towards the back. We addressed this when Geo went ham on John's X10's!
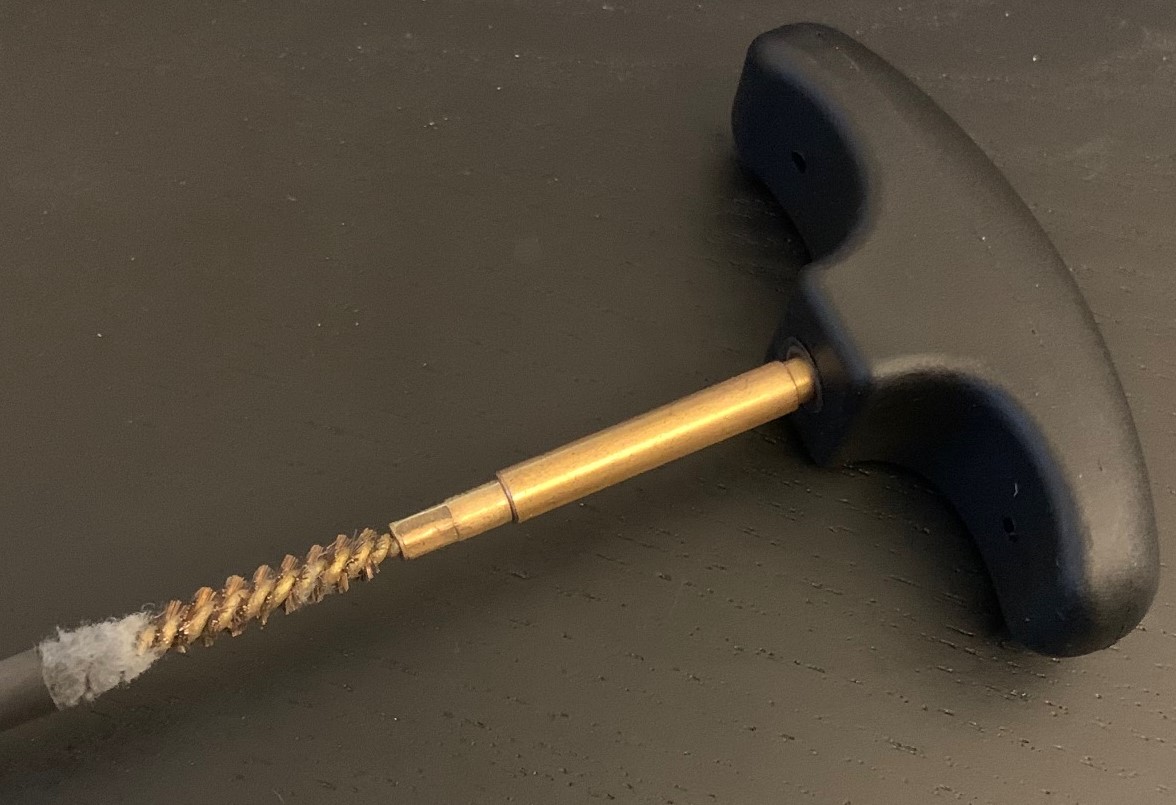 Once cut we need to rough up inside the shaft then clean any carbon dust. This is to ensure a clean but rough surface for the glue to get the best grip. Geo has a special set of tools unavailable in the UK for this. Basically a pipe cleaner and brass bristle combination that cleans and roughens up the inside of the shaft ready for gluing. To answer the question about how he has tools not available in the UK .. Yes, he did get it imported specially and yes, that's probably OCD as all heck.
 Next up is prepping and gluing the pin. To ensure a good surface for the glue to get a grip of, the mirror finish of the pin is roughed up. If you don't do this the nock pin might come out when put under any strain. Small hobby files (from Lidl) are sufficient for this task as nock pins are soft aluminium. Glue here is a 24hr epoxy like Araldite (Araldite = arrow tight!). Hot melt can be used for nock pins but you will burn your fingers as its pretty fiddly. Also any rear strike of an arrow that totals the pin, will leave your shaft unshootable so epoxy isn't a problem. Test fit the pins to make sure there are no issues. Now mix up the two epoxy components using a cocktail stick. Squeeze roughly 1.5 cm from each tube for a dozen arrows. Making sure you have the right end of the arrow and using the cocktail stick tip, carefully put some glue inside the end of the arrow. Take a pin, push it into the glued end and rotate the pin at least 360° to evenly spread the glue inside. Put the arrow somewhere out of the way vertically with the pin downwards so allowing the weight of the arrow to keep pressure on the pin. Leave for 24 hours.
 Now we roughen up the the points as well. The pointy end of the arrow gets pulled out of dense target foam every shot and embedded in wood if a shot goes wrong so that puppy should REALLY be securely glued in place. However, the points are usually stainless steel which is a lot harder to work with than aluminium. Here we've resorting to a hobby vice and a metal rasp to roughen up the part of the pile that goes inside the arrow. Its best if you don't do this while chairing conference calls with work colleagues when working from home. They tend to wonder what the rasping noises are.
Its time to get serious. You know the adage "measure twice, cut once". Well here its "measure 27 times". There's no coming back from messing up a cut on an arrow. If its a new set of arrows with no predecessors to be matched against then no problem = 28" arrow - nock groove to point is a skoosh. When trying to match someones new carbons to the length of their ali's when point and nock sizes are different ....... that's stressful. Prototype one shaft cutting smaller and smaller increments checking the nock groove to point against your template after every cut. Take breaks, come back and measure again. This way you can easily get under 1mm difference, with real care about 0.1mm.
 If you are confident and secure in your skills, great but being this anal and OCD about it means you don't ever have to explain to another archer why you messed up!
Now the hacksaw and breadknife lore. Actual cutting of the shaft is done with a specialist arrow saw. The rotating disc abrades the shaft away making a precise clean cut. When cutting, slowly rotate the arrow shaft in the same direction the cutting disc is turning. More details can be found in the Easton Arrow Tuning and Maintenance guide. Truly a definitive guide to arrows. Next we clean up the newly cut end the same way we did for the pin. Rough up the inside, clean off the carbon dust.
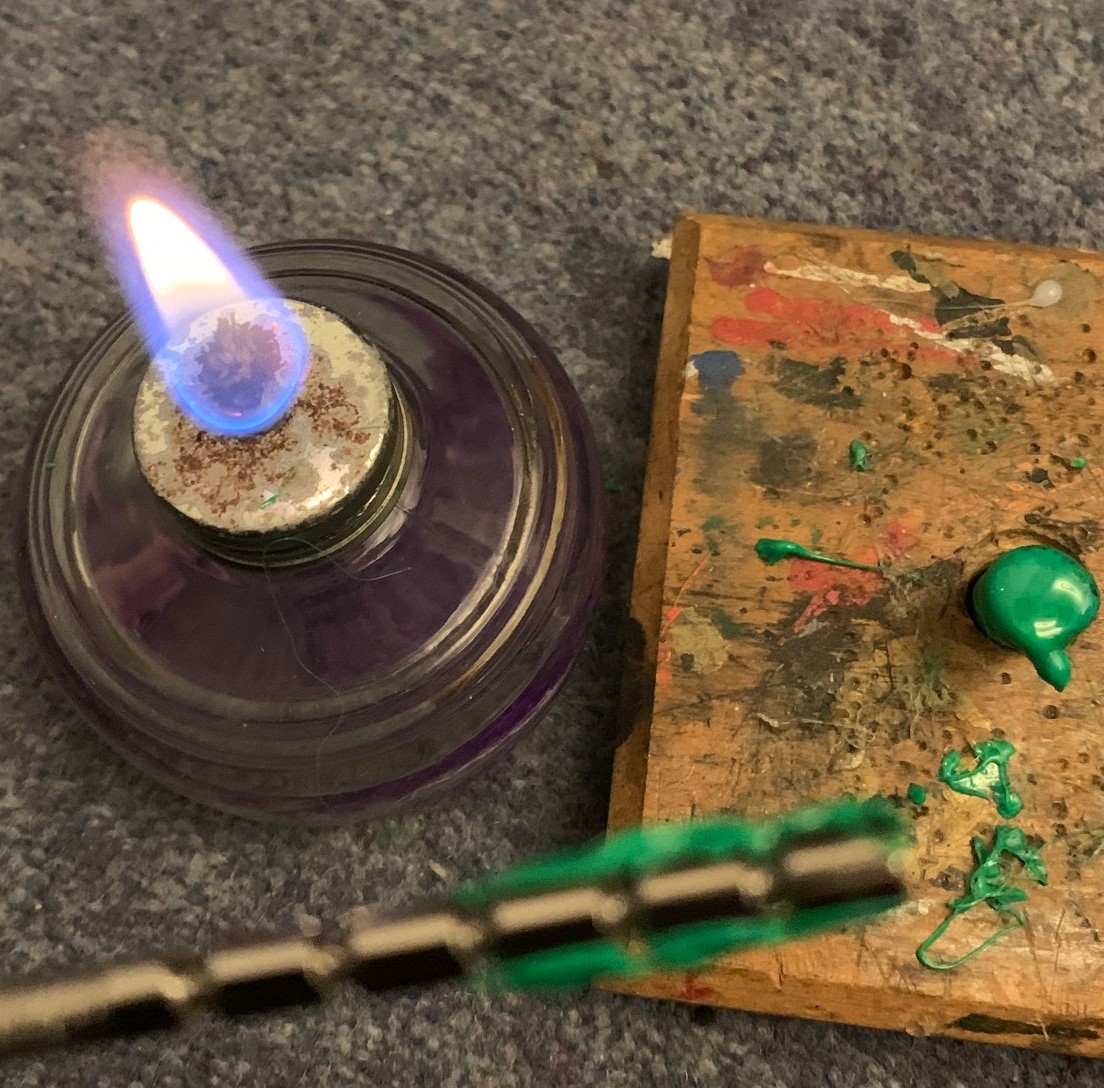
 To glue in the point we use hot melt .. in this case specialist Goblin Snot hotmelt arrow glue. You could use a standard glue gun but no point in being cheap when your arrows may have cost several days/a weeks salary. Again test fit the points to the shafts. Heat the hotmelt - here we use a small methylated spirits burner - and apply three dabs around the haft end of the arrow point. You need to be quick with this next part ... Heat the glued end of the point again for 8-10 seconds and ease it smoothly into the end of the arrow, rotating as you push it in. Now on a wooden surface you don't mind getting dented, up end the arrow and with hands near the point of the arrow, push down into the wood to make sure the point is all the way into the arrow. There will be excess glue like in the picture. After 10-15 seconds roll this glue FORWARD towards the point and the excess glue will come off. Its a good habit to get into rolling the glue forward even on ali's. Roll it backwards towards the nock end and you could strip carbon off your arrow. So get use to rolling forward only.
And that's it. Not difficult as long as you take your time and are sure about every permanent action you take .. like slicing a couple of hundred pounds of someone else's kit to bits! Admittedly, it can be stressful when cutting a set to exactly the same size as an existing set. As he makes and modifies almost all the arrows for our veteran archers, is it any wonder Geo has gone prematurely grey and looks like he's nearing retirement. He's only 37!
* * *
Please note: Cutting carbon or aluminium shafts should only be done with a special arrow cutter like the one the club owns. Unless its John's arrows obviously! ;o)
Discover more from Glasgow Archers
Subscribe to get the latest posts sent to your email.

Before I bought an arrow saw, I used a Dremel rotary tool that I clamped in a small vice which was clamped to a stiff board. Another clamp served as a stop for the other end of the shaft. Was quite fiddly but gave cuts as good as with the expensive arrow saws (which are needed by coaches working with serious archers in that the only way to really tune new/different arrow shafts is with bare shaft testing a sample set cut long (or uncut) and then cutting off small segments until the shafts test correctly, then the others can be cut to that determined length). This process requires, btw, hot melt point insertions as the points need to be removed repeatedly to make the cuts on the test set shafts. Later you can clean those shafts and use epoxy. (I preferred 5 minute epoxy as that epoxy can be broken down by repeated heatings. The 24-hr epoxy is about as permanent as you can get, so you have to be sure everything is spot on before using it.)