
Are Woodies Difficult to Make?
Recently a newer archer was asking about wooden shafted arrows. Were they better to shoot? Were they more accurate? Were they hard to make?
Well, we can't really say they are "better", lets go with more appropriate or fitting for a traditional bow. Definitely can't say they are more accurate since aluminium or carbon shafts are going to always be straighter. But hard to make? That one is objectively easy to answer. Its not hard and its fun as well as very satisfying to make your own traditional arrows. You don't even need that much in the way of equipment. Lets have a look ...
Equipment
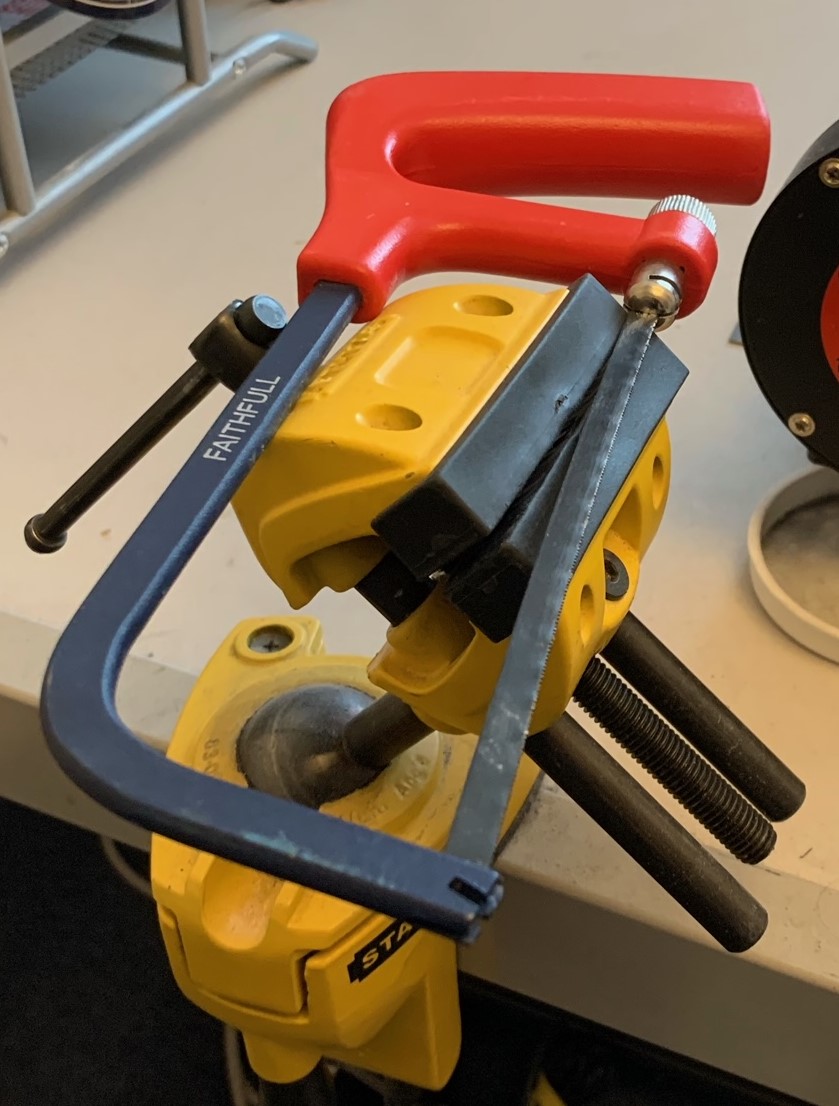 Small Hacksaw: This is for cutting the wooden shafts to your preferred size. You can literally go to the Pound Shop and pick up one there. The blade doesn't need to be specifically for wood as even blades intended for metal will slice through the wood. A small rotating blade on a dremel would also do the job. Ideally, you'll have a small vice like the one we discussed in The Archery Workshop page but holding it steady on a workbench edge works just as well.
 Tapering Tools: These are effectively double bladed pencil sharpeners that prepare the ends of the shaft for nock and point. These tools come in 5/16, 11/32 and 23/64 of an inch which should be the same as the diameter of your shaft - which is effectively the spine of a wooden arrow. These "pencil sharpeners" taper the ends of the shaft to two different angles. One shallow for the point and one more steeply cut for the nock. If you look at the picture hopefully you can see what we mean and how the point and nock fits.

The holy trinity - epoxy, super and fletching.
Glue: The best sort of glue for the point is a 24 hour epoxy like Araldite (just think arrow tight! ;o). These come in two tubes - a hardener and an epoxy resin which you mix together thoroughly in 50/50 proportions. Put the glue inside the point, push the correct end of the shaft (the large tapered end) into the point and rotate it 360' keeping pressure on, wipe off the excess glue that squidged out and place somewhere to be undisturbed, vertically point down, for 24 hours for the glue to cure and its done. If you ever need to remove the point, place point in boiling water then torque off using pliers or that vice we're always on about.
The glue for the nock is more of a take your pick option. Superglue is ok for once as it will definitely stick it on AND it's easy to torque a broken nock off. Other glues like generic general purpose glues do the job as well although ease of getting broken nocks off can vary.
Fletching glue is the easiest of all. Almost any fletching glue will work great on woodies. The feathers and the wood easily absorb the glue and its rare a woodie throws a fletch. Stripping them usually requires a sharp knife, a steady hand and perhaps a pass or two with some sandpaper to smooth over any bumps.

12 years of making arrows and only 300ml used!
Waterproofing: If wooden arrow shafts aren't waterproofed, they will rot and/or warp as a result of getting wet. Something inevitable in the wettest city in Scotland (Glasgow gets on average 170 days of rain a year!). To waterproof the shafts, several coats of Danish Oil is ideal. Danish Oil is " ... a wood finishing oil, often made of tung oil or linseed oil. Because there is no defined formulation, its composition varies among manufacturers." or so says Wikipedia. Using a cloth/kitchen roll to wipe the oil into the wood, give it three coats leaving the shaft to dry after each coat. The first coat should be diluted a little with white spirit to allow the wood to soak the mixture in deep. Once dry give it a rub down with a cloth. You need to repeat this process twice more. Our editor made a set for someone that (not sensibly) stored them in a damp basement for 10 years! The points rusted but the waterproofed shafts were perfect.
Optional Step
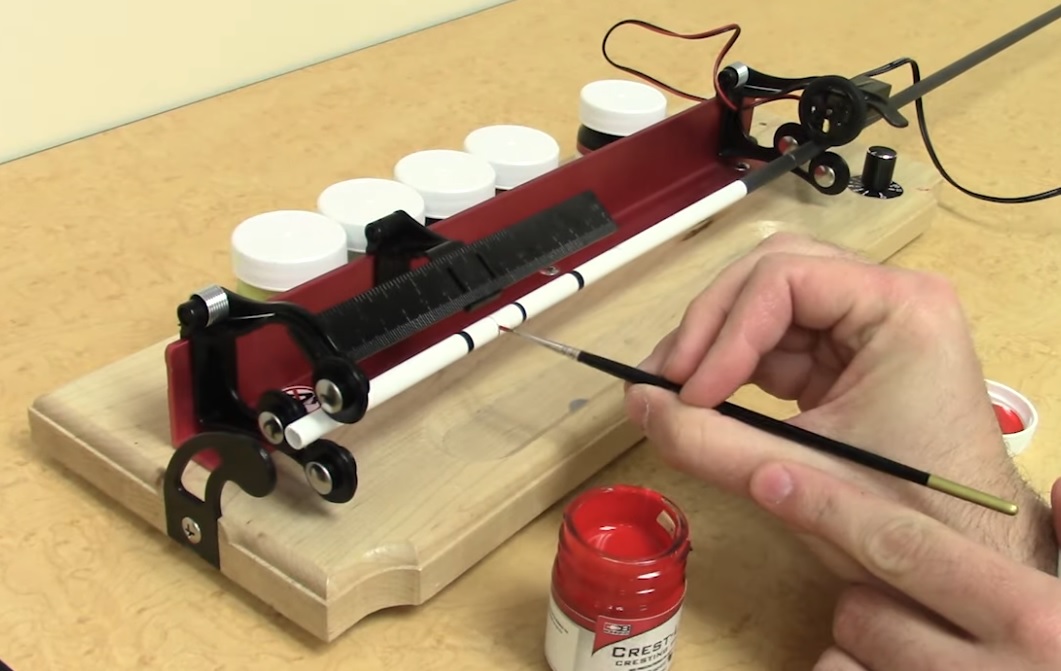
Black and Red ... sensible cresting for GA
Cresting: If your creative juices started flowing at the thought of getting all artistic with your arrow making, there's another step you can fit into the above process, cresting. This is a tradition way to mark your arrows with bands of colour on the arrow shaft. You need to either buy or make a cresting jig. A cresting jig is a frame with a small motor that will spin your arrow (slowly, not at 5000rpm!) while you hold a paintbrush/fibre-tip pen against the spinning shaft so painting a band. These puppies such as Bohning's Professional Arrow Crester can cost £300 or more making them a luxury item for most or gift for the traditional archer who has everything. More reasonably you can make them yourselves if you have a little electrical knowhow. More information about cresting can be found here.
So that's all there is to making woodies. Its a useful skill to have as woodies do break and being able to replace them quickly might save you from a shootie free day while waiting for new arrows to be delivered. It also puts you a little closer to our bowyer forefathers. Dead historic n that, no? ;o)
Discover more from Glasgow Archers
Subscribe to get the latest posts sent to your email.

1 Response
[…] we published on making your own woodies. Link to videos about making your own cresting […]